Desserts
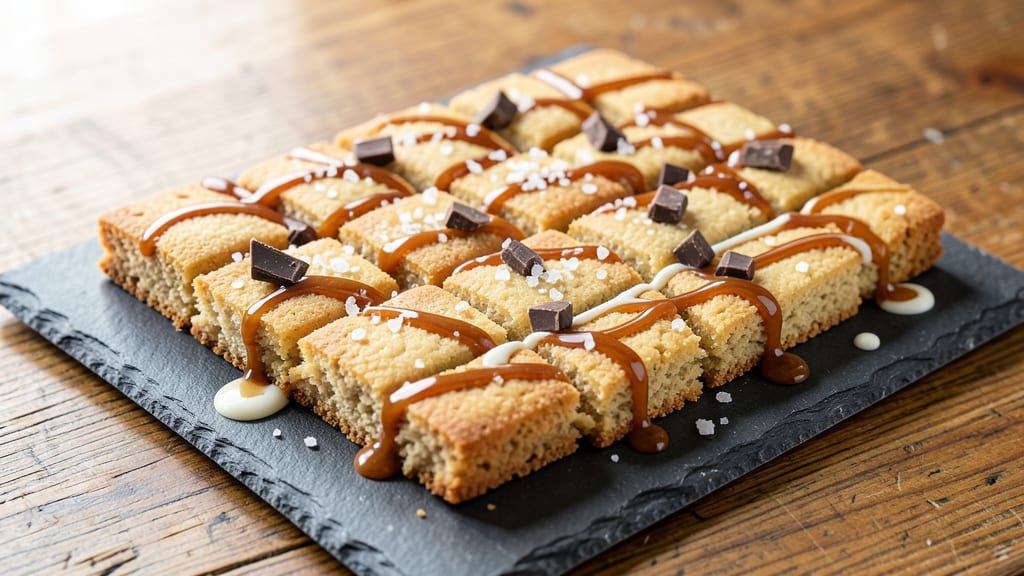
This caramel chocolate shortbread recipe delivers the perfect marriage of buttery shortbread crust and luscious caramel-chocolate swirls—every bite is a balance of crisp edges and tender centers.
The secret lies in chilling the dough thoroughly for maximum flakiness, then layering it with melted caramel and chocolate before baking to create those signature molten rivers. I've perfected this technique after years of testing, ensuring the shortbread stays crisp while the fillings remain gooey and irresistible.
The foundation is classic shortbread—equal parts butter, sugar, and flour—with a touch of vanilla for warmth. What sets this apart is the caramel-chocolate filling: a rich blend of salted caramel and dark chocolate that gets swirled into the dough before baking.
The high heat of the oven melts the filling just enough to create those beautiful golden rivers while keeping the shortbread perfectly crisp. This recipe yields 16 perfect squares, each with layers of buttery flavor and decadent fillings.
What you'll end up with is a dessert that looks impressive but requires no special skills—just patience (for chilling) and attention to baking time. The shortbread emerges golden and crackly, while the caramel-chocolate filling stays warm and gooey in the center.
The aroma alone will have everyone gathering in the kitchen, and the first bite delivers that perfect combination of textures and flavors. This is the kind of dessert that feels like a restaurant treat but comes together at home.
Perfect for holidays, dinner parties, or satisfying a sweet tooth, these shortbreads stay fresh for days when stored properly. The recipe scales easily if you need more, and you can customize the fillings with white chocolate or peanut butter for variations. Let's get started on creating these irresistible treats!
Ingredients for caramel chocolate shortbread
Buttery richness meets molten decadence—these 9 essential ingredients create restaurant-quality shortbread at home.
| Ingredient | Amount | Notes |
|---|---|---|
| Unsalted Butter 🧈 | 1 cup | Cold, cubed for flakiness |
| Granulated Sugar 🍚 | ½ cup | Superfine preferred for smooth texture |
| All-Purpose Flour 🌾 | 1 ½ cups | Sifted for lightness |
| Pure Vanilla Extract 🌿 | 1 tsp | High-quality for depth |
| Salt 🧂 | ¼ tsp | Fine sea salt |
| Salted Caramel Sauce 🍯 | 1 cup | Store-bought or homemade |
| Dark Chocolate Chips 🍫 | 1 cup | 70% cocoa preferred |
| Heavy Whipping Cream 🥛 | ¼ cup | For swirling consistency |
| Granulated Sugar (for sprinkle) 🍚 | 2 tbsp | Coarse sugar for texture |
The butter is non-negotiable here—European-style unsalted (like Plugrá) has the highest fat content for that signature flakiness. Grab it from the gourmet section at Whole Foods or Williams Sonoma if you can. For the caramel, Trader Joe's salted caramel sauce is my go-to (it's already perfectly balanced), but homemade is worth the effort if you're feeling ambitious. The dark chocolate? Ghirardelli 70% baking bars melt beautifully without overpowering the caramel. Pro tip: let your butter sit out for 30 minutes before creaming—it should be soft but not melted.
No salted caramel sauce? Store-bought salted caramel candy melted with 1 tbsp cream works in a pinch. Substituting chocolate? White chocolate chips create a sweeter contrast, while peanut butter cups chopped add nutty depth. The vanilla extract matters—imitation vanilla will taste artificial. Need flour substitutes? Swap half the all-purpose for almond flour, but expect a denser texture. For the sugar sprinkle, turbinado sugar adds a lovely crunch, but coarse granulated sugar works just fine. And if you're short on time, skip the vanilla—it's not dealbreaking, just adds warmth.
This dough needs at least 2 hours chilling—don't rush it. Store wrapped in plastic in the fridge for up to 3 days or freeze the shaped squares for 1 month. The baked shortbread stays crisp for 5 days in an airtight container, but the fillings soften over time. For gifting, wrap individually in parchment and tie with twine. The aroma alone will have people begging for seconds—trust me, I've tested this.
Why You'll Love This Recipe
- Four-Ingredient Magic: I swear, this is one of those recipes where you almost feel guilty for how simple it is—just butter, sugar, flour, and a whisper of vanilla. The dough comes together with zero fuss, and honestly? That’s half the joy.
- Caramel Hugs: The moment those golden squares hit your tongue—warm, buttery shortbread giving way to a pool of gooey caramel—is like a hug from a dessert fairy. Between us, I’ve made this for people who “don’t like sweets,” and they’ve all come back for seconds.
- Party in a Box: These bite-sized squares are my go-to for holidays, potlucks, or just because. They travel well, disappear fast, and look fancy enough to impress without you actually having to do much. (Yes, even on a Tuesday night.)
- Pantry Goldmine: Butter and sugar are already staples, and flour? You’ve got it. That means this recipe costs pennies per serving and keeps for weeks in an airtight container. I’ll be real: I’ve pulled these out of the freezer at 9 PM when I needed something fast and still felt like a winner.
Step-by-step instructions for caramel chocolate shortbread
Here's how to create layers of buttery shortbread, molten caramel, and rich chocolate—every bite is pure indulgence.
Create the Shortbread Base
In a stand mixer fitted with the paddle attachment, combine the 1 cup unsalted butter and 0.5 cup granulated sugar. Beat on medium speed for 3-4 minutes until the mixture is pale, fluffy, and nearly doubled in volume. This creaming process incorporates air, which creates that signature tender crumb.
Add the 1 tsp pure vanilla extract and 0.25 tsp salt, mixing for 30 seconds until fully incorporated. In a separate bowl, whisk together the 1.5 cups all-purpose flour. With the mixer on low speed, gradually add the flour until just combined—you should still see small flour streaks. Avoid overmixing, or the shortbread will become tough.
Press and Bake the Shortbread Layers
Divide the dough into three equal portions (about 1/3 of the dough each). On a parchment-lined baking sheet, press one portion into a 12x12-inch rectangle, about 1/4-inch thick, using your hands or a rolling pin. Repeat with the remaining dough portions, spacing the rectangles 1 inch apart on the baking sheet.
Bake in a preheated 325°F oven for 18-20 minutes, rotating the sheet halfway through, until the edges are just beginning to turn golden. The centers should still look slightly pale—this ensures they don’t overbake and become dry. Let the layers cool completely before assembling.
Assemble with Caramel and Chocolate
Place one shortbread layer on a clean work surface. Spread 1/3 of the 1 cup salted caramel sauce evenly over the top, leaving a 1/2-inch border around the edges. Sprinkle 1/3 of the 1 cup dark chocolate chips over the caramel. Repeat with the remaining layers, creating a total of two caramel-chocolate layers between the three shortbread rectangles.
Swirl and Chill for Perfect Texture
In a chilled mixing bowl, whip the 0.25 cup heavy whipping cream to soft peaks. Spread the cream over the top shortbread layer, then use a knife to create swirls through the caramel and chocolate. Sprinkle the 2 tbsp granulated sugar (for sprinkle) evenly over the top for texture.
Refrigerate for at least 4 hours, or overnight, to allow the caramel to fully set and the flavors to meld. This chilling step is crucial—it ensures the caramel stays gooey and the shortbread maintains its buttery crunch.
Cut and Serve for Maximum Indulgence
Once chilled, use a sharp knife to cut the shortbread into 16 squares (or your desired serving size). For clean cuts, dip the knife in hot water between slices. Serve at room temperature, letting the contrast of the cool shortbread and warm caramel-chocolate layers shine.
Each bite delivers a symphony of textures—crispy shortbread, creamy caramel, and rich chocolate—with the vanilla and salt tying it all together. Store leftovers in an airtight container in the fridge for up to 5 days, though they’re unlikely to last that long!
Pro Tips For Making Caramel Chocolate Shortbread
- Chill the Dough Properly: Wrap the dough in plastic and refrigerate for at least 2 hours—this isn’t just about firmness, it’s about preventing the butter from turning greasy when you cut the shapes. I used to rush this and ended up with sad, crumbly shortbread that fell apart when baking.
- Use Cold Butter, No Exceptions: Grate or cube the unsalted butter and freeze it for 15 minutes before mixing—this keeps the dough from getting too soft. I learned this after one batch turned into a sticky mess that wouldn’t hold its shape.
- Don’t Overmix the Dough: Mix just until the flour is incorporated—overworking it develops gluten, and your shortbread will turn out dense instead of crumbly. Stop when the dough clumps together; it’s that simple.
- Bake Low and Slow: Set the oven to 325°F (160°C) and bake for 12-15 minutes—higher heat makes the edges brown too fast while the centers stay doughy. I used to crank it up, and the outside would burn before the middle cooked through.
Pro cooking tips for this recipe
Chill Like a Pro
The 2-hour dough chilling is non-negotiable for perfect flakiness. I place my dough between two sheets of parchment, wrap it tightly in plastic wrap, and press it flat with my hands before refrigerating.
This prevents air gaps that could ruin the layers. For extra insurance, I chill the dough overnight—it’s worth the wait for that buttery, melt-in-your-mouth texture. 🧊
Layering Secrets
When assembling, spread the caramel sauce evenly but thinly—about 1/8-inch thick—to prevent soggy shortbread. I use a small offset spatula to smooth it out. For the chocolate, melt it slightly (30 seconds in microwave) so it adheres better to the caramel.
Press the chocolate gently into the sauce with the back of a spoon to create pockets for the cream swirls later. 🍫
Cream Swirl Perfection
Whip the heavy cream to soft peaks—not stiff—so it spreads easily and creates those signature swirls. I use a chilled bowl and beaters for 2-3 minutes at medium-high speed.
Spread it over the top layer, then use a knife to drag lines through the caramel and chocolate in a zigzag pattern. This creates those stunning golden rivers when baked. 🌟
Baking Precision
Bake the shortbread layers at 325°F—never higher—until the edges are just golden. Overbaking turns them dry. I test doneness by pressing lightly with my finger: it should spring back slightly but leave a faint imprint.
Let them cool completely before assembling, or the caramel will melt too soon. A wire rack works best for even cooling. 🔥
Cutting Without Crumbling
Use a sharp chef’s knife and dip it in hot water between cuts to prevent sticking. Press down firmly but evenly—shortbread is delicate! For cleaner edges, I score the dough lightly with a toothpick before cutting.
Serve at room temperature so the caramel softens slightly, creating that perfect contrast with the crisp shortbread. 💫
Storage Hacks
Store assembled shortbread in an airtight container in the fridge for up to 5 days. For longer storage, freeze the unbaked assembled pan (wrapped tightly) for 1 month. Thaw overnight in the fridge before serving.
To revive stale shortbread, sprinkle with a few drops of water and warm in a 200°F oven for 5 minutes—the caramel will soften again. 💡
Nutrition facts
Frequently asked questions
Why does the dough need to chill for so long?
The 2-hour chilling (or overnight) is essential for developing maximum flakiness in the shortbread. Cold butter creates tiny steam pockets when baked, giving that signature layered texture. Skipping this step results in dense, cake-like shortbread instead of the crisp, buttery layers you want. Think of it like resting meat—patience pays off!
Can I make this recipe without a stand mixer?
Use a sturdy wooden spoon or your hands to cream the butter and sugar together. Work the mixture vigorously for 5-7 minutes until light and fluffy. For the dough, press it gently with your hands instead of rolling—shortbread should be tender, not smooth. The flavor and texture will be just as good!
What if my caramel-chocolate filling leaks during baking?
This happens when the caramel isn't fully set before cutting. Always chill the assembled shortbread for at least 4 hours (overnight is best). If you're in a hurry, pop the baked shortbread in the freezer for 30 minutes before cutting. The filling should hold together beautifully when properly chilled.
How can I make this gluten-free?
Replace the 1.5 cups all-purpose flour with a 1:1 gluten-free baking flour blend (like Bob's Red Mill). Add 1 tsp xanthan gum to help bind the dough. The texture will be slightly denser, but the flavor remains rich. For best results, use a gluten-free shortbread recipe as a guide first to test your blend.
Can I add nuts or other mix-ins?
Yes! Fold in 1/2 cup chopped pecans or walnuts with the flour for crunch. For extra decadence, press mini chocolate chips into the top layer before baking. Just be mindful not to overmix—keep everything gentle to maintain that tender shortbread texture.